If you’re trying to upload a large file to WordPress, you might run into this error message: “The Uploaded file exceeds the upload_max_filesize directive in php.ini.” What is this error, and how can we fix it?
The uploaded file exceeds upload_max_filesize directive in php.ini occurs when you upload files that are larger than permitted on the server-side setting. Web hosts and administrators often apply limits to file sizes to save space and maintain website responsiveness.
You will likely encounter the upload_max_filesize error when you attempt to upload large images, plugins, videos, themes, and other files to your WordPress site. It can be frustrating, but the good news is that with a little guidance you can quickly fix the issue. Here, we’ll help you learn how to correct this error so you can update your site and move on.
Before you get started, be aware that all solutions involve increasing the server-side file size limits. You might not have permission to do this if your hosting account is restricted at the hosting level. However, you may be able to upgrade your account to allow for larger file sizes — be sure to check these details in your hosting agreement.
Not technically inclined? Skip right to step 4. Otherwise, select from one of our suggested methods to increase your site’s file size limitation.
One of the most straightforward ways to solve the upload_max_filesize error is to adjust the file size upload limit in the php.ini file.
The php.ini file contains the default configurations that affect applications that require PHP — WordPress typically uses page.php to render the pages’ content on your website. In addition to upload sizes, the php.ini file controls variables like file timeouts and resource limits.
To increase the file size upload limit, you’ll need to access and adjust the upload_max_filesize directive in the php.ini file. You can make the changes to php.ini using one of several methods:
If your web host uses cPanel and WHM, you should be able to edit the php.ini file configurations from within the cPanel or WHM dashboard.
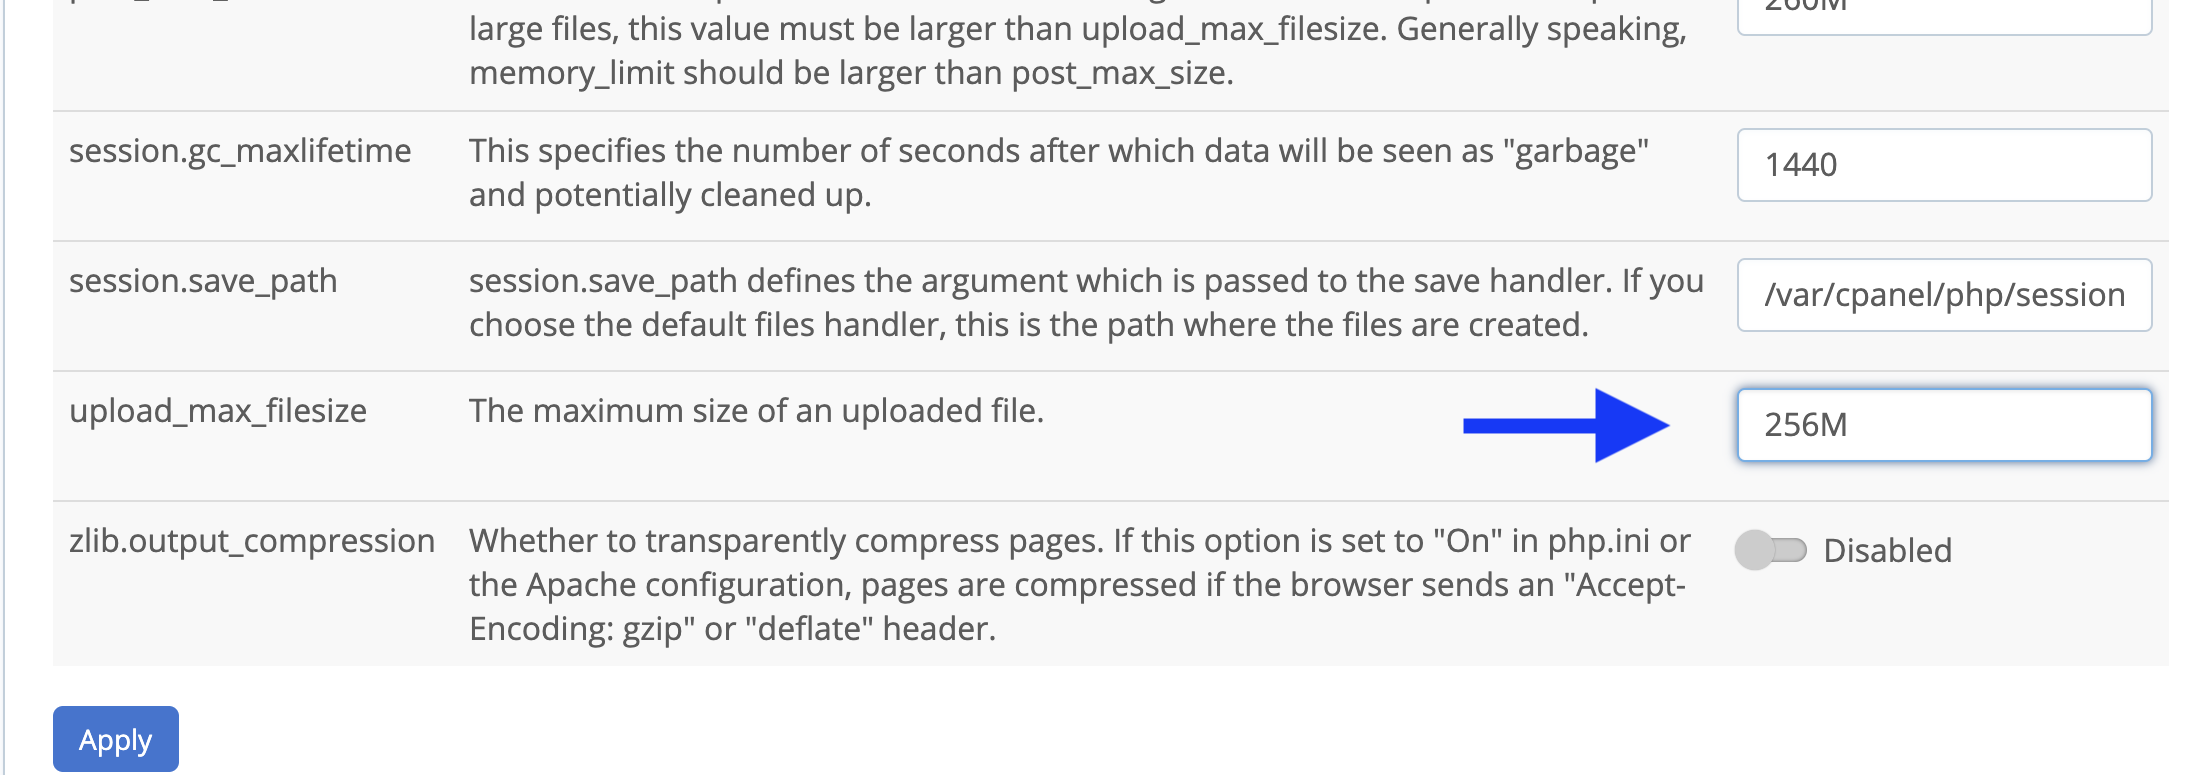
1. Open your cPanel dashboard.
2. Look for Select PHP Version.
3. Set upload_max_filesize to a higher value by choosing the appropriate size limit from the dropdown menu.
1. Open your WHM dashboard.
2. Look for the MultiPHP INI Editor.
3. Set the upload_max_filesize directive to a larger number.
After adjusting the upload_max_filesize value, test your change by attempting to upload a file larger than the original limit.
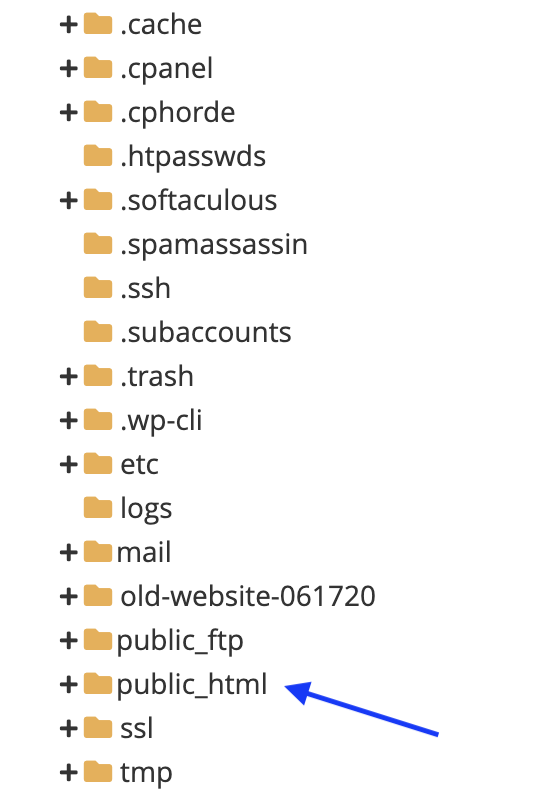
If you find that your host has restricted your ability to directly edit the php.ini file, you may be able to use FTP; you can modify your php.ini file by using a File Transfer Protocol (FTP) to access the WordPress root directory (public_html):
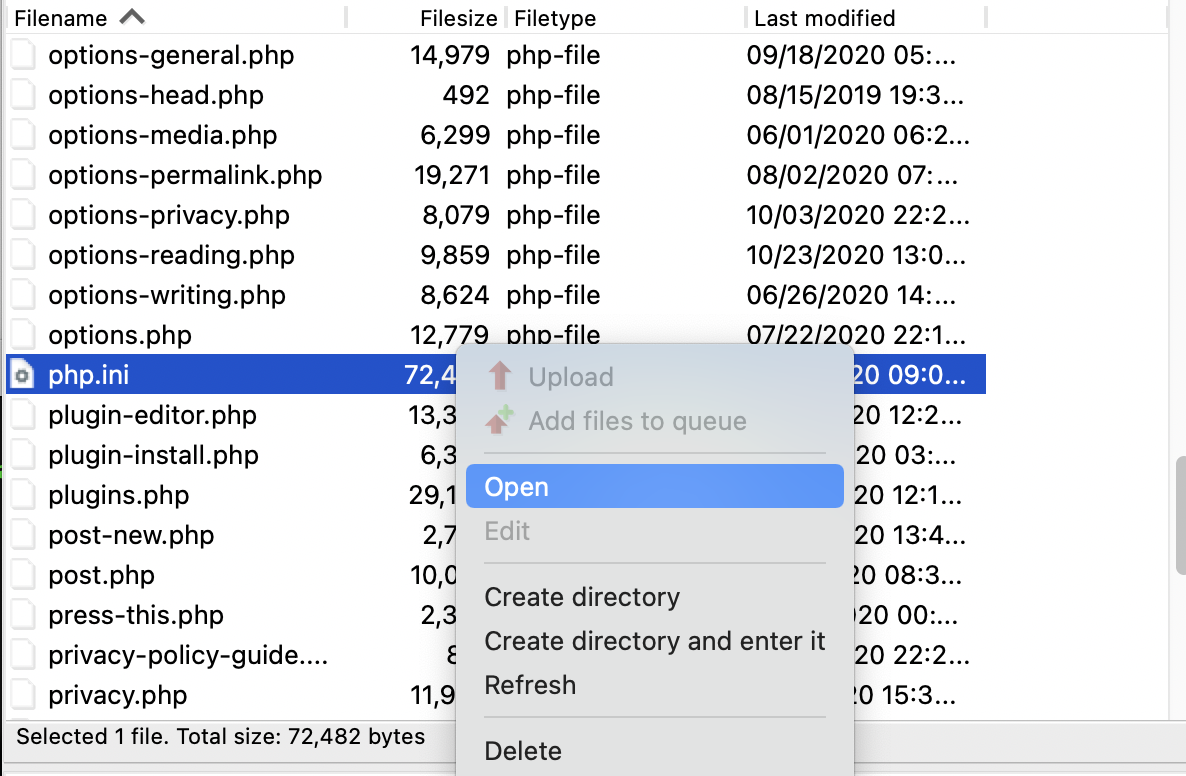
1. Connect your server via FTP.
2. Navigate to your site’s root folder.
3. Look for the php.ini file, or create a new file and name it php.ini.
4. Edit the file size limitation to meet your needs by locating the following code in the php.ini file:
upload_max_filesize = 128M
post_max_size = 128M
5. If the code is not present in your php.ini file, add it. Depending on your needs, replace 128M with a higher value — for example, 512M.
6. Save your changes and exit the file.
7. Test your changes by trying to upload a file that is larger than the original limitation.
Follow these steps to adjust file upload limits by directly editing the php.ini file through the command line:
1. Log into the hosting account where your WordPress site is hosted.
2. Access the Command Line Interface (CLI) and enter:
cd /etc/php/7.0/cli
3. Open the php.ini file in a text editor with the command:
sudo nano php.ini
4. Locate the line: upload_max_filesize = 128M (this number can vary).
5. Replace 128M with a higher value if needed.
6. Save the file and exit.
7. Test your site by trying to upload a file that is bigger than the original limitation.
The .htaccess file includes configurations used by the Apache web server. This file allows you to create special rules that tell your web server how to function.
By default, WordPress sites use the .htaccess file to manage the permalinks structure. The .htaccess file also allows you to use plugins that can enable various functions:
1. Connect to your WordPress site via FTP.
2. Locate the .htaccess file in the root folder.
3. Add the following code snippet, adjusting the file size values to meet your needs:
php_value upload_max_filesize 12M
php_value post_max_size 13M
php_value memory_limit 15M
4. Test the changes.
If you add the code snippet and receive an internal server error message, your server is likely running PHP in CGI mode. In this case, you won’t be able to change .htaccess using this method. Remove the snippets and use a different method.
You can also edit .htaccess through the cPanel dashboard:
1. Log into your cPanel dashboard through your web host.
2. Access File/File Manager and select the directory you need to access (oftentimes this is public_html).
3. Click Settings in the upper right corner and make sure the Show Hidden Files box is checked.
4. Hit Save.
5. Locate the .htaccess file in the list of files.
6. Right-click on the .htaccess file and select Edit.
7. Adjust the file size limitations to accommodate your needs.
Some website administrators may find it easiest to edit .htaccess via the command line:
1. Access your WordPress website’s server.
2. Enter the following command:
cd /path/to/wordpress
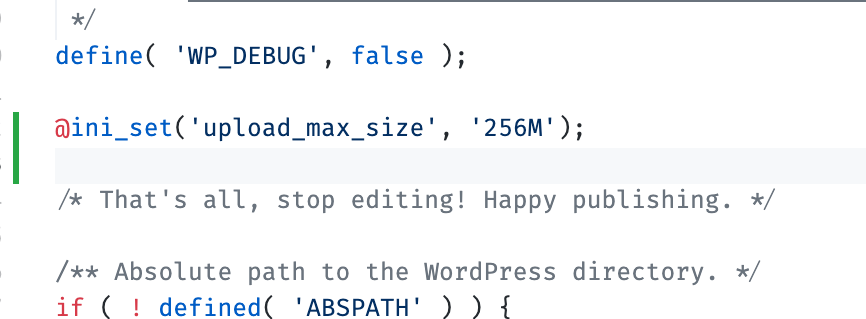
3. Open the wp-config.php file with any text editor with the command:
sudo nano wp-config.php
4. Search for the following comment line:
/* That's all, stop editing! Happy blogging. */
5. Add this line above the comment:
@ini_set('upload_max_size' , '256M' );
6. Save and exit.
You can edit the wp-config.php file in the root folder of your website’s code:
1. Log into your web hosting account.
2. Access your cPanel dashboard.
3. Click on Files/File Manager.
4. Check the box for Show Hidden Files if it is unchecked.
5. Select “document root for:” from Directory Selection.
6. Click Go.
7. Add the following code snippet to the bottom of wp-config.php, adjusting the file size figures as needed:
@ini_set( 'upload_max_size' , '256M' );
@ini_set( 'post_max_size', '256M');
@ini_set( 'memory_limit', '256M' );
8. Save and test.
Tip: You can also edit WordPress site code through your WP dashboard!
No matter which option you choose to configure file size limitations on your website, be sure to test your work before moving on to other projects.
The quickest way to test your site is to try to upload a file that is larger than the original file size limitation. It’s also a good idea to upload a file larger than the newly configured file size limitations. This is a quick way to double-check you’ve inputted the right figure.
You can also go to Media/Add New in your WordPress dashboard to check if the new maximum upload limit matches the figure you set.
If you find your hosting company has restricted your ability to access or edit file size settings, you should try reaching out to them directly. Many hosts limit file upload sizes and restrict access to settings as part of their service agreements.
Be sure to carefully read through your hosting agreement. The website may be limited when it comes to upload size because of the service plan level you’ve chosen. Your host may require you to upgrade to a plan with more features, including higher file size limitations.
Now you know how to fix the frustrating error, “the uploaded file exceeds upload_max_filesize directive in php.ini.” If you’re still having trouble, try another method or reach out to your hosting company.